
Point of sale
Install a receipt printer
Connect a thermal receipt printer to Kiosk in about 15 minutes — USB, Bluetooth, or Ethernet — with screenshots for Windows, macOS, Linux, and Cashier, plus the blank-slip fix.
On this page
- 01What you need
- 02USB, Bluetooth, or Ethernet?
- 03Step 1 — Pick the printer and plug it in
- 04Seat the paper roll (the 10-second version)
- 05Step 2 — Add it in Windows
- 06Step 3 — Add it on macOS
- 07Step 4 — Add it on Linux
- 08Step 5 — Download the bridge from Cashier
- 09Step 6 — Detect printers and save
- 10Step 7 — Print a test receipt
- 11If nothing prints
A receipt printer is the last handshake of the sale — the slip a customer folds into a pocket while they still trust you. Kiosk already shows receipts on screen and sends them on WhatsApp, so paper is an upgrade, not a requirement. When the queue starts asking for a slip, this walkthrough takes you from box to cut slip in about 15 minutes.
What you need
- A thermal 58mm or 80mm receipt printer (not inkjet) — no ink, no ribbons, heat does the printing.
- The data USB cable from the box — charger leads light the printer and print nothing.
- A thermal paper roll, shiny side toward the print head.
- The till PC, laptop, or tablet dock — the Print Bridge must run on that machine.
- About 15 minutes. Do it before the Friday rush, not during it.
USB, Bluetooth, or Ethernet?
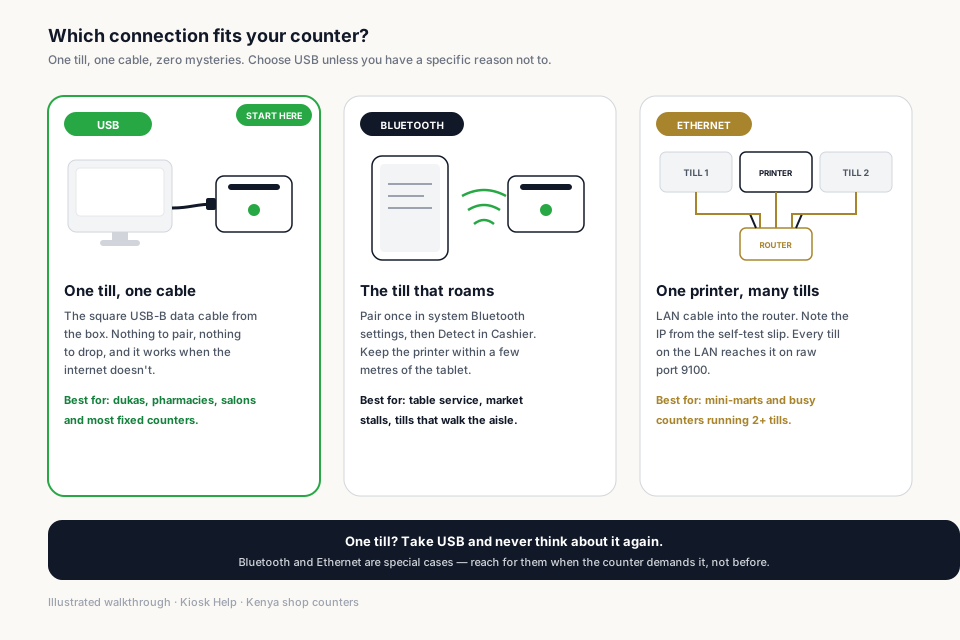
Pick the connection before you touch any settings — it decides everything downstream. One till, one printer: USB. A tablet that walks the aisle: Bluetooth. Several tills sharing one counter printer: Ethernet.
Step 1 — Pick the printer and plug it in
- Step 01USB is the shop-floor default. Bluetooth if the till moves. Ethernet if several tills share one printer (port 9100).
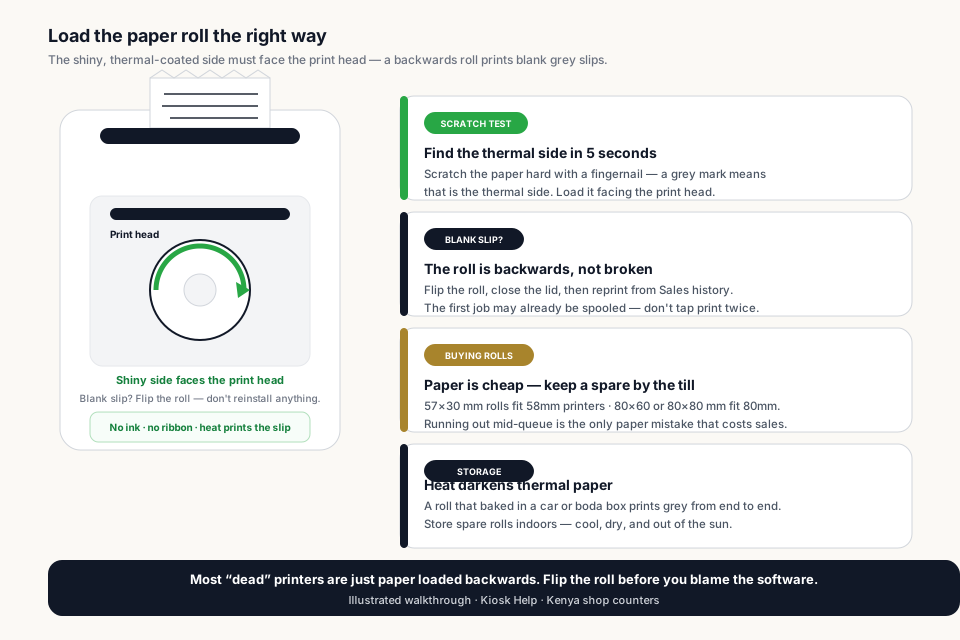
- Step 02Seat the roll shiny-side to the print head, close the lid, switch POWER ON.
- Step 03Hold FEED while powering on for a self-test. A printed slip means the hardware is alive — before any software gets a vote.

Seat the paper roll (the 10-second version)
Most printers returned to the shop in anger were never broken — the roll was simply loaded backwards. The shiny, thermal-coated side must face the print head. Not sure which side is shiny? Scratch the paper hard with a fingernail: the side that greys is the one that prints.
Step 2 — Add it in Windows
Open Settings → Bluetooth & devices → Printers & scanners. Detect only reads that list. Skip Microsoft Print to PDF and Fax.

- Step 01If the thermal name is missing: Add a printer → The printer that I want isn’t listed.
- Step 02Local printer. Port USB001, or the COM port Device Manager showed.
- Step 03Driver Generic / Text Only. Name it Xprinter. Set it Online. Then Detect — not before.


Step 3 — Add it on macOS
- Step 01Open System Settings → Printers & Scanners → Add Printer.
- Step 02Keep the factory name so Detect can read it. Use a generic ESC/POS or the maker's thermal driver — not AirPrint.
- Step 03Set it as default if this Mac is only a till.

Step 4 — Add it on Linux
- Step 01Install CUPS if needed, then add a raw ESC/POS queue (http://localhost:631 or your Printers app).
- Step 02Confirm lpstat lists the printer idle.
- Step 03Run bash install-palmart-print-bridge.sh from the Linux zip.

Step 5 — Download the bridge from Cashier
The Print Bridge is a till tool. It lives on the Cashier page — the same screen you sell from — not in Settings, not on the Desktop, not in a WhatsApp zip. Open Cashier on this computer (the one with the printer plugged in). That chip is the only doorway we keep.
- Step 01On the till computer, open Cashier.
- Step 02Tap Receipts on screen, then Connect a printer.
- Step 03Download the Print Bridge from that chip (Windows, Windows 7, macOS, or Linux). Unzip and run it here.

Step 6 — Detect printers and save
- Step 01Unzip and run the installer once. Windows 10/11: Install-Palmart-Print-Bridge.cmd (no Node.js needed). It can start hidden at sign-in.
- Step 02Click Detect printers. Pick the row marked (receipt). Skip Fax and PDF — every time.
- Step 03If you manage the shop, Detect can save the name on the branch so every cashier on that till inherits it. You can also set it under Branches → Receipt details, then Save.

Step 7 — Print a test receipt
- Step 01The chip should now show the printer name, not Receipts on screen.
- Step 02Complete a small test sale. Paper should feed and cut cleanly.
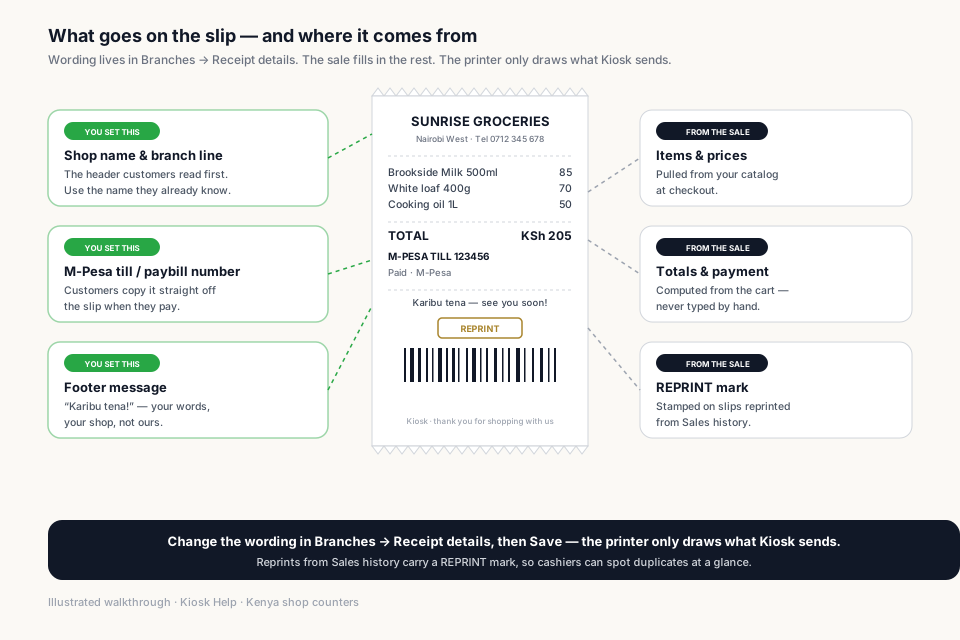
- Step 03Shop name, M-Pesa till, and footer come from Branches → Receipt details — fix wording there, never on the printer.

If nothing prints
Work down the checklist, then read the Detect toast. Two messages, two rooms — do not mix them up.
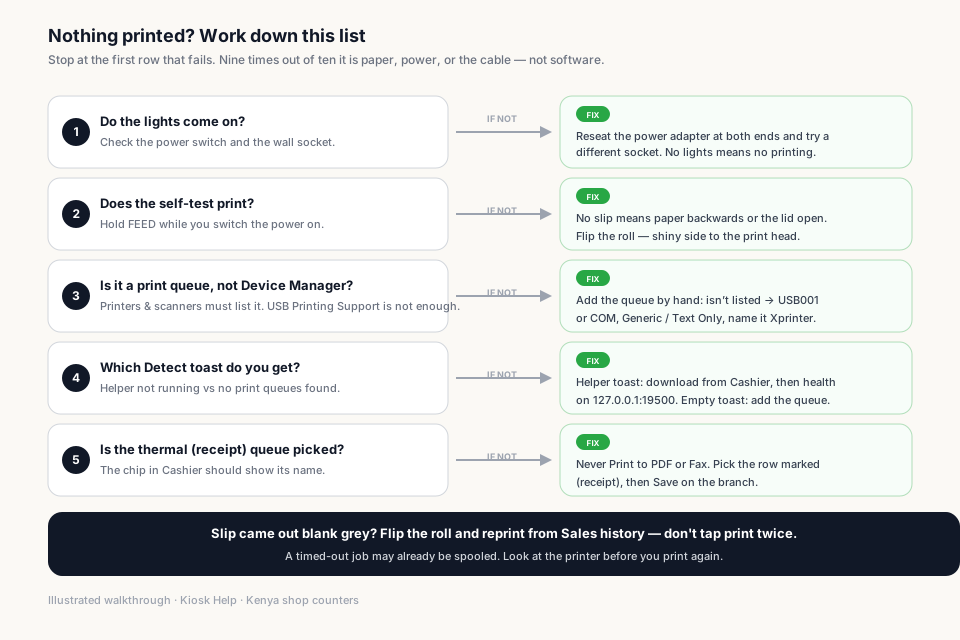

- “Printer helper is not running” — the bridge. On this PC open http://127.0.0.1:19500/health. If that fails: Cashier → Connect a printer → download, run Install-Palmart-Print-Bridge.cmd, Detect again.
- “No print queues found” (or only Fax / Print to PDF) — the bridge is fine. Add a queue: isn’t listed → USB001 or the COM port → Generic / Text Only → name it Xprinter, Online → Detect again.
- Until Xprinter sits under Printers & scanners, Detect cannot see it. Device Manager showing USB Printing Support is not a queue.
- Lights on, no paper — charger cable, or roll seated backwards.
- Job timed out — look at the printer before tapping print again. The bytes may already be spooled.
Frequently asked
Do I need a printer to start selling?
USB, Bluetooth, or Ethernet?
Will Epson, Xprinter, or Caysn work?
Device Manager shows the Xprinter. Why is Detect empty?
Which Detect toast means what?
Where do I download the Print Bridge?
The slip came out blank and grey. Is the printer broken?
How do I change my shop name or M-Pesa till on the receipt?
Related articles
Still stuck setting up?
Send a message with your business name and subdomain — we will help you get the till selling.