
Suppliers & supplies
The complete supplier flow — from first vendor to final payment
Follow a vendor through every stage: create, link, order, receive, pay, and see their portal — with screenshots at each step.
On this page
Every vendor relationship in Kiosk follows the same loop: connect the supplier, order what you need, receive the delivery, pay the bill — then repeat. This guide walks the whole loop in detail, with the exact screens at every stage, so you can run several suppliers side by side without losing stock, cost, or money.
Stage 1 — Create the supplier
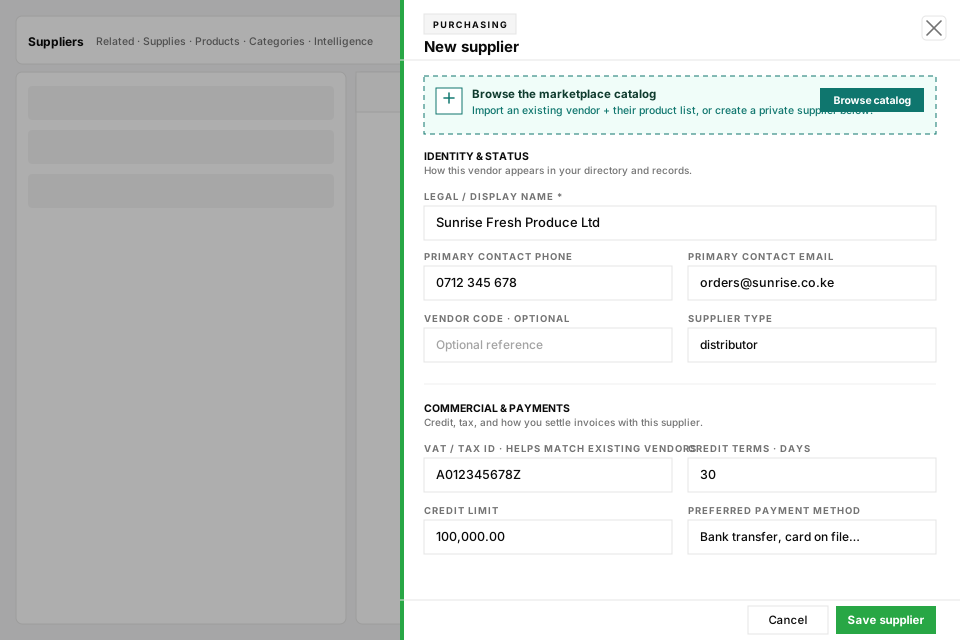
- Step 01Open Suppliers and tap New supplier.
- Step 02Enter the legal / display name — this is what appears on every receipt and report.
- Step 03Add the contact phone and email. The phone becomes the WhatsApp number Kiosk uses when you send orders.
- Step 04Add a VAT / tax ID if you have one — Kiosk matches it against existing vendors so you never create duplicates.
- Step 05Set credit terms (e.g. 30 days) and a credit limit if they sell to you on account.
- Step 06Save, then set a payout destination on the profile so paying later is one tap (see Stage 6).
Stage 2 — Link the products they supply
- Linked products form the supplier’s shelf — the exact list you see when ordering and when receiving.
- Link from the supplier profile (add each product with their SKU and your last cost), or from a product’s detail while you create it.
- Links carry cost and stock hints, so new orders and supplies open pre-filled with sensible prices.
- A vendor with no links still works — you can add ad-hoc lines on a New supply or order from scratch — but linking makes everything faster.
Stage 3 — Order (the purchase order)
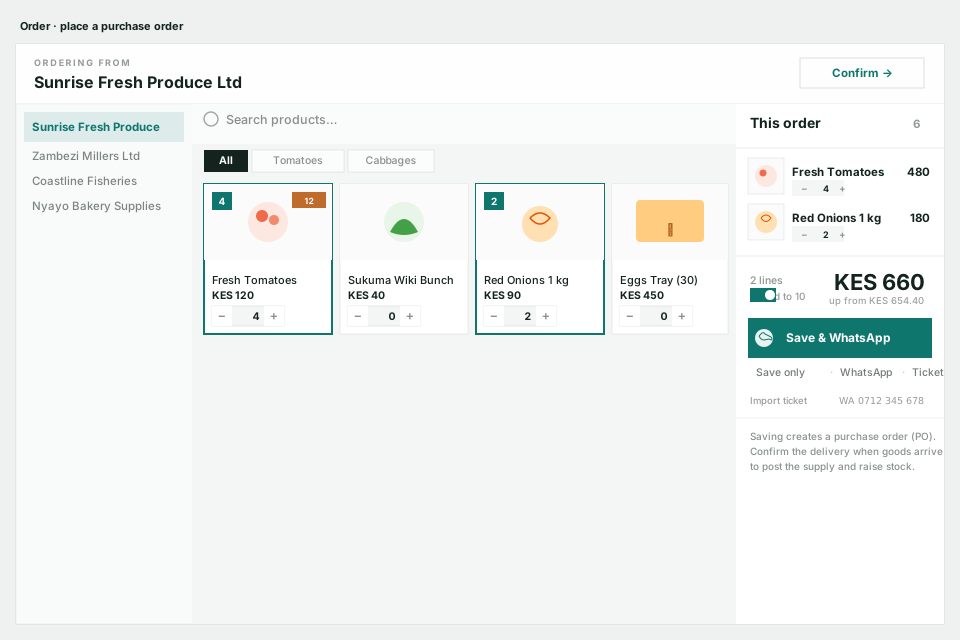
Order is a till-style screen built around the supplier’s shelf. You build a purchase order (PO), then send it — by WhatsApp, by portal, or just by saving the number.
- Step 01Open Order and pick the supplier — their linked products load as tiles with cost and low-stock badges.
- Step 02Tap products to add them; use +/− to set quantities. Search and family chips keep big catalogues fast.
- Step 03Review the slip on the right. Round to 10 nudges the total to the nearest 10 shillings for cash suppliers.
- Step 04Choose how to send: Save & WhatsApp opens their number with the order list; Save only stores the PO; Ticket copies a shareable order link.
- Step 05Saving creates a PO number. Marketplace-connected vendors also see the order in their portal inbox.
Stage 4 — Receive the delivery
When goods arrive, the delivery becomes a supply — the moment stock actually rises. Two paths: confirm the open order, or record a walk-in directly.
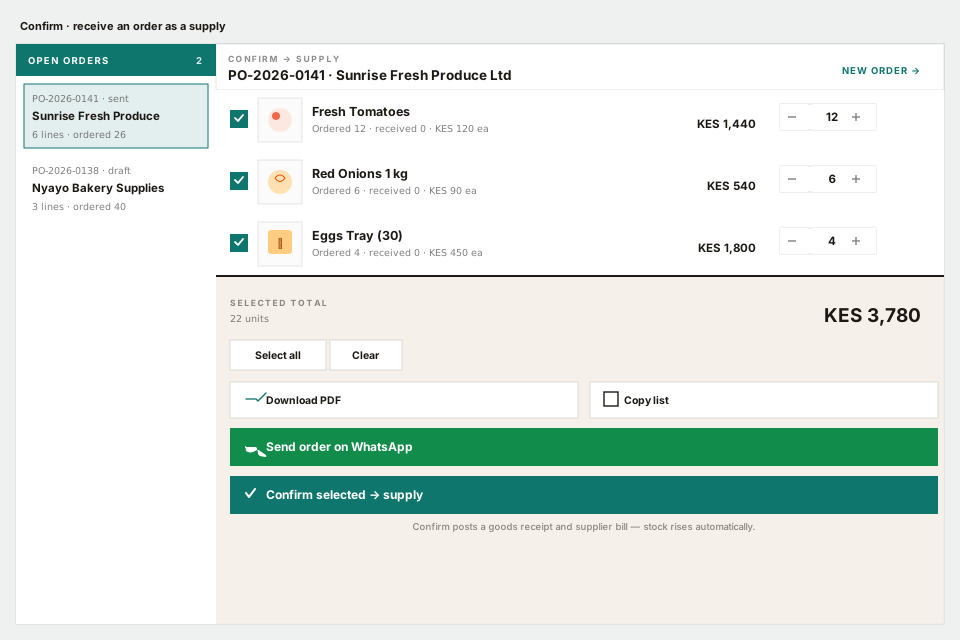
- Step 01Ordered in advance? Open the order, tap Confirm, and pick the open PO.
- Step 02Check the boxes and set the quantity that actually arrived — partial deliveries are fine, stock rises for exactly what you received.
- Step 03Tap Confirm selected → supply. Kiosk posts a goods receipt, creates the supplier bill, and raises stock in one go.
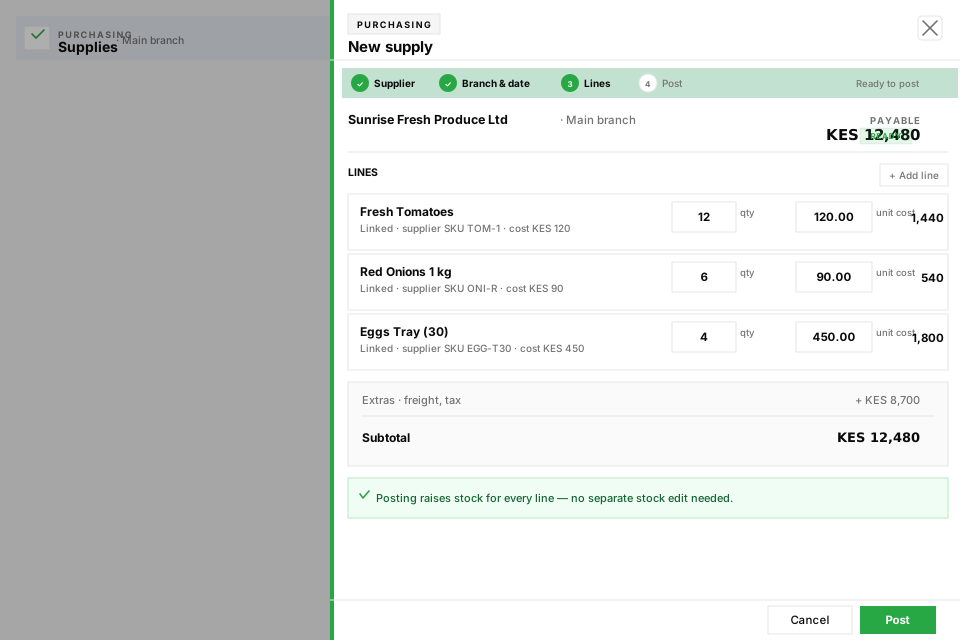
- Step 04No order? Walk-in deliveries go through Supplies → New supply: pick supplier, branch, and date, add lines with quantity and unit cost, then Post.
Stage 5 — Pay the supplier
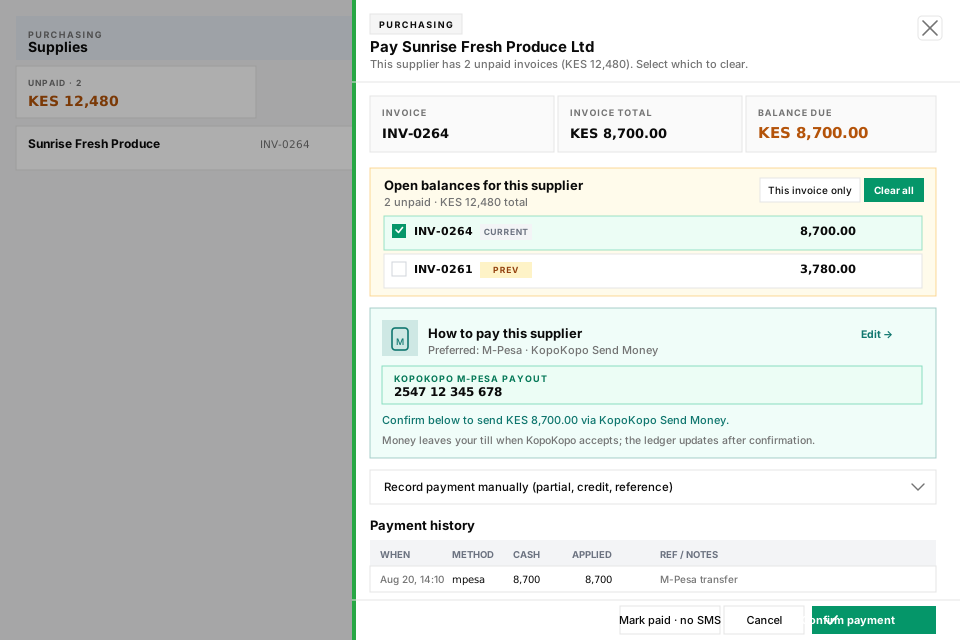
Supplies is your vendor ledger. Unpaid bills sit amber; Pay settles one, Pay all clears every open invoice for that vendor at once.
- Step 01Open Supplies and filter to Unpaid (or use Pay open in the header).
- Step 02Tap Pay on a bill. The drawer shows the invoice, the balance due, and any other open balances for the same supplier.
- Step 03Pay the real way: if the supplier has a KopoKopo destination (M-Pesa, till, or paybill), Confirm payment sends the money and updates the ledger automatically.
- Step 04Paid outside Kiosk (cash at the gate, bank transfer)? Record it — Confirm payment notifies the supplier by SMS, or Mark paid · no SMS updates the ledger silently.
- Step 05Partial, credit, or reference? Open the advanced options to set the amount, method (cash / bank / M-Pesa), supplier credit applied, and notes.
Stage 6 — Manage the supplier profile
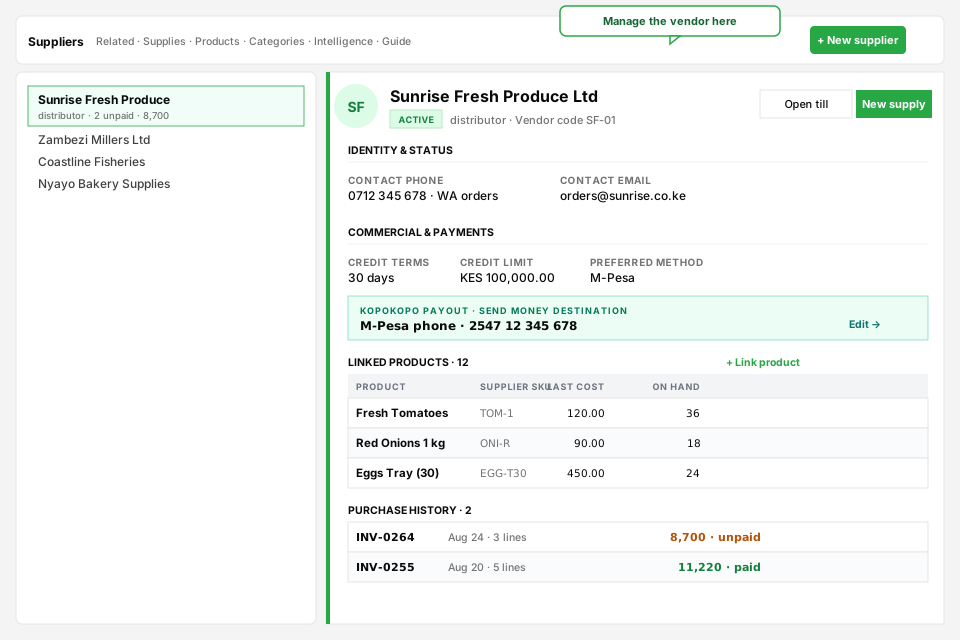
- Open any supplier to manage everything from one profile: identity, contacts, credit terms, and status (active / inactive / blocked).
- Set the KopoKopo payout destination — M-Pesa phone, till (Buy Goods), or paybill — so Send Money payments go straight to them.
- Link and unlink products, review last costs, and watch on-hand stock against each link.
- Purchase history keeps every invoice and its payment status under the vendor, so month-end is one scroll.
- New supply opens the receiving drawer pre-selected to this vendor; Open till jumps to the cashier-style receive screen.
Stage 7 — The supplier portal (what your vendor sees)
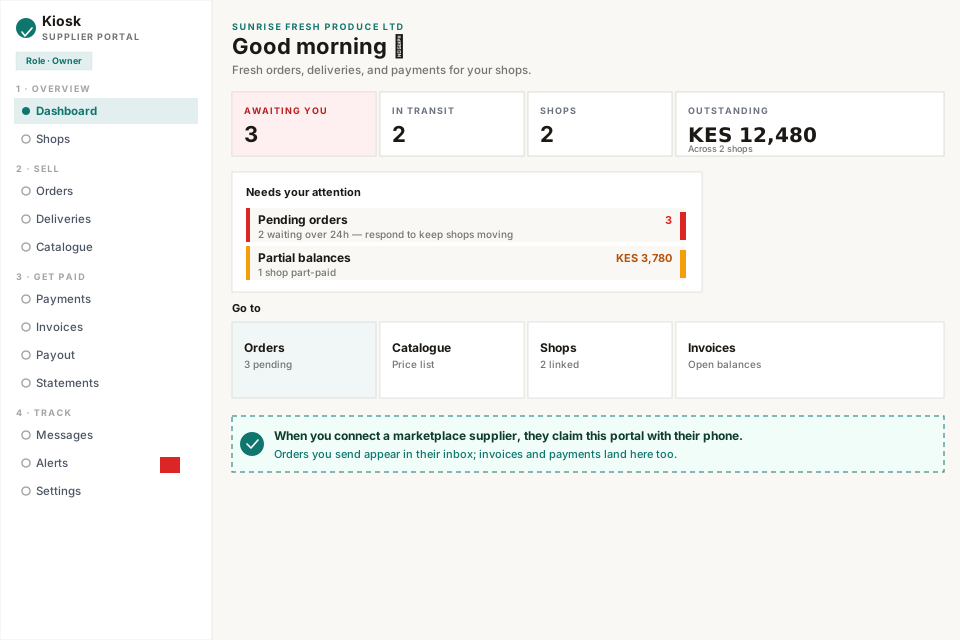
Marketplace-connected suppliers get their own portal. They claim it once with their phone, then orders, invoices, and payments live there — no more WhatsApp screenshot chasing.
- Step 01Connect a marketplace supplier from the New supplier drawer (or Marketplace).
- Step 02Share the claim link — they enter their phone, receive a code, and set a password. No long setup.
- Step 03When you save an order, it lands in their Orders inbox with the product list and PO number.
- Step 04They manage their catalogue (prices and stock), see deliveries, and track invoices, payments, and statements in one dashboard.
Frequently asked
Where do I start with a brand-new vendor?
Do I have to order before I can record a delivery?
How do I actually pay suppliers?
What does Pay all do?
What does my supplier see in their portal?
I paid cash at the gate but the bill still shows unpaid — why?
How do deposits work?
Related articles
- Suppliers, supplies & purchase ordersAdd vendors, link products, order stock, confirm deliveries, and keep payables straight — with screenshots of every screen.
- Add a supplierSave vendor details once so every delivery, cost, and payable stays attached to the right person.
- Record a supply (receive stock)Post a vendor delivery so stock rises automatically and costs land on the right products.
- Why you should record every supplyPosting a supply updates stock automatically — and locks in cost, payables, and a clean audit trail.
- Understand stock levelsHow on-hand quantity updates after sales, supplies, and transfers.
- Get the most out of KioskThe master guide: one catalog, one till, one storefront. Follow the daily rhythm, then jump into every deeper guide from here.
Still stuck setting up?
Send a message with your business name and subdomain — we will help you get the till selling.